# CloudFlare Storage Setup

### **How to Configure CloudFlare R2 Storage:**

**Step 1:** Register and log in to your [CloudFlare accoun](https://www.cloudflare.com/)t.

**Step 2:** Select CloudFlare R2 from the side menu and click the "**Create Bucket**" button.

<div align="left"><figure><img src="https://1156155356-files.gitbook.io/~/files/v0/b/gitbook-x-prod.appspot.com/o/spaces%2Fpb8ANp0ZN6ZvWH8LcR5c%2Fuploads%2FcuiL3AkAeLDq0MCMelZj%2Fflare1.png?alt=media&#x26;token=184e79bc-8a81-4f52-9387-ec3c7165ffdd" alt=""><figcaption></figcaption></figure></div>

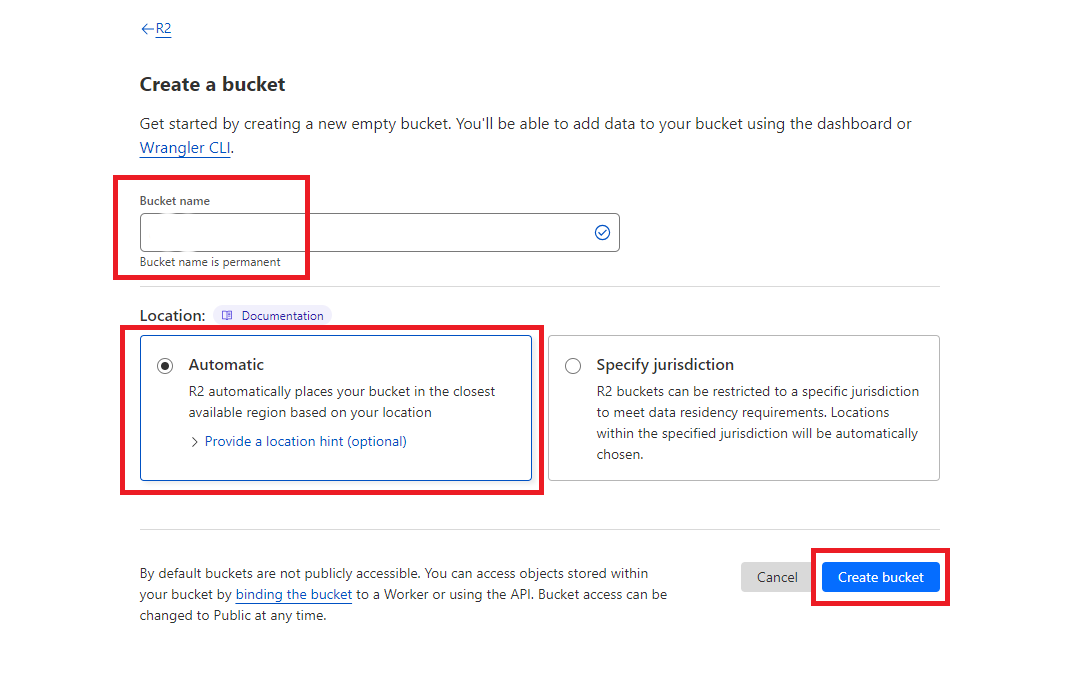
**Step 3:** Specify the bucket name as needed and click "**Create Bucket.**"

<div align="left"><figure><img src="https://1156155356-files.gitbook.io/~/files/v0/b/gitbook-x-prod.appspot.com/o/spaces%2Fpb8ANp0ZN6ZvWH8LcR5c%2Fuploads%2Fm8jQIjL04c0IjuzgPEmo%2Fflare2.png?alt=media&#x26;token=fe6e80b2-fcb9-455b-a6b0-a680c3c6dae0" alt=""><figcaption></figcaption></figure></div>

**Step 4:** After your bucket is created, click on the "**Manage R2 API Token**" link.

<div align="left"><figure><img src="https://1156155356-files.gitbook.io/~/files/v0/b/gitbook-x-prod.appspot.com/o/spaces%2Fpb8ANp0ZN6ZvWH8LcR5c%2Fuploads%2FRY4jZIDWN3hinrN8O5Rz%2Fflare3.png?alt=media&#x26;token=16b7c347-d32e-4c70-84fb-5d7562d15538" alt=""><figcaption></figcaption></figure></div>

**Step 5:** You will be redirected to your API Tokens page. Click the "**Create API Token**" button.

<div align="left"><figure><img src="https://1156155356-files.gitbook.io/~/files/v0/b/gitbook-x-prod.appspot.com/o/spaces%2Fpb8ANp0ZN6ZvWH8LcR5c%2Fuploads%2F41fhfl0BQi1rpJ2wWGYF%2Fflare4.png?alt=media&#x26;token=3e49ba77-3aa1-4d88-9ef1-f633f797dc13" alt=""><figcaption></figcaption></figure></div>

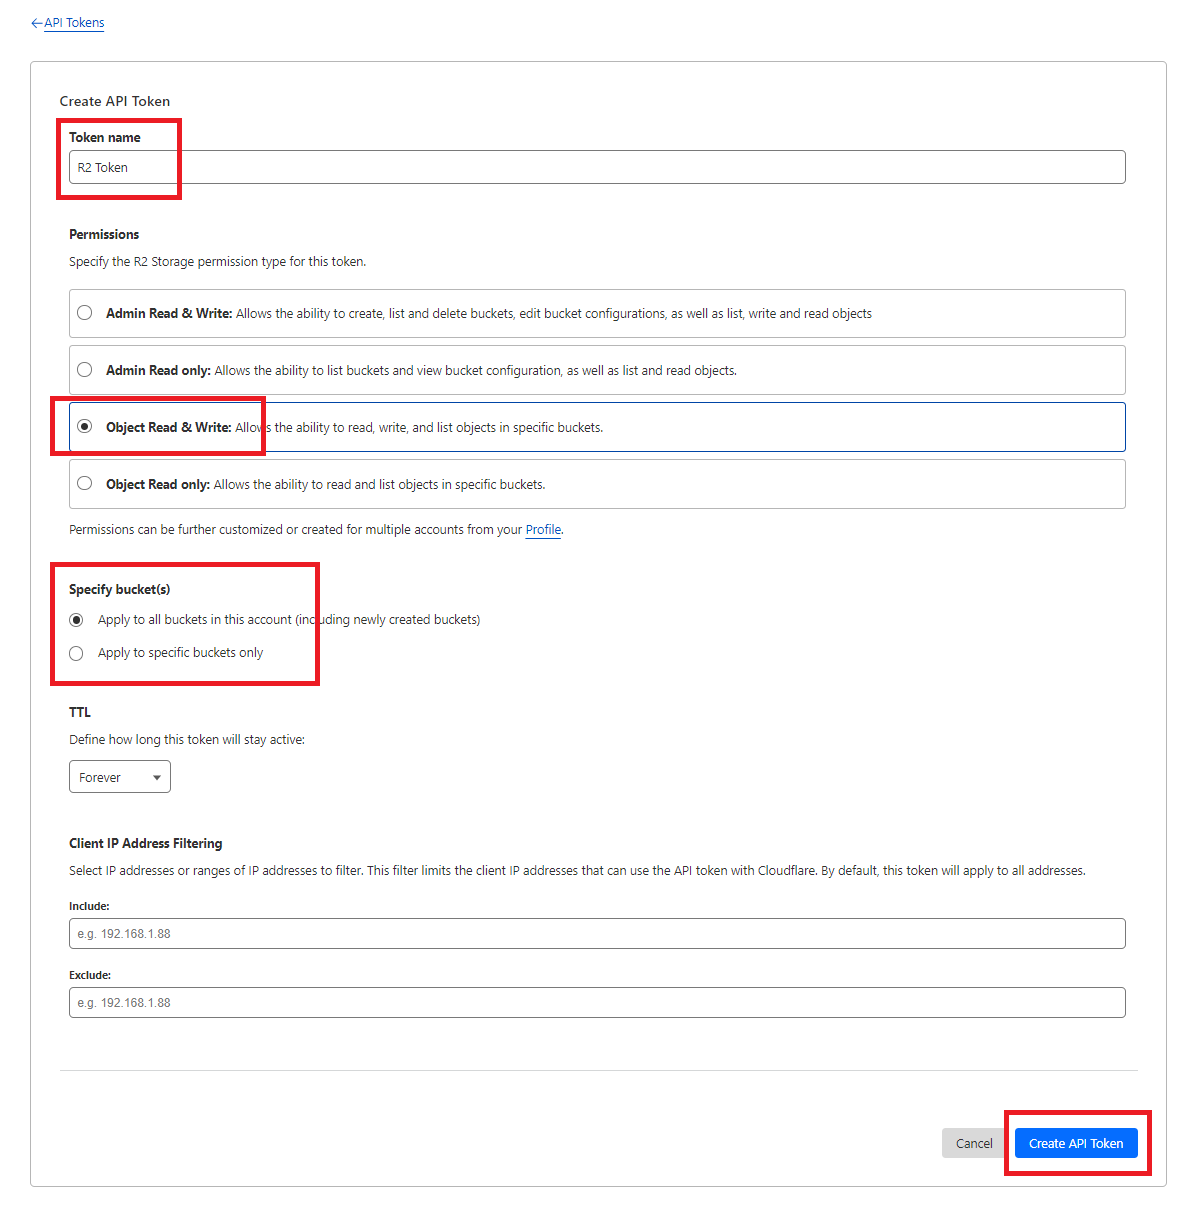
Step 6: Provide Token name as needed, in Permission section select **Object Read & Write** and specify if you want this token to be valid of a specific bucket or all your buckets afterwards click on **Create API Token** button.

<div align="left"><figure><img src="https://1156155356-files.gitbook.io/~/files/v0/b/gitbook-x-prod.appspot.com/o/spaces%2Fpb8ANp0ZN6ZvWH8LcR5c%2Fuploads%2FFbDiuC0dRBJihrtfJMZN%2Fflare5.png?alt=media&#x26;token=a9bc2cdd-cd83-4068-921f-956452b1366d" alt=""><figcaption></figcaption></figure></div>

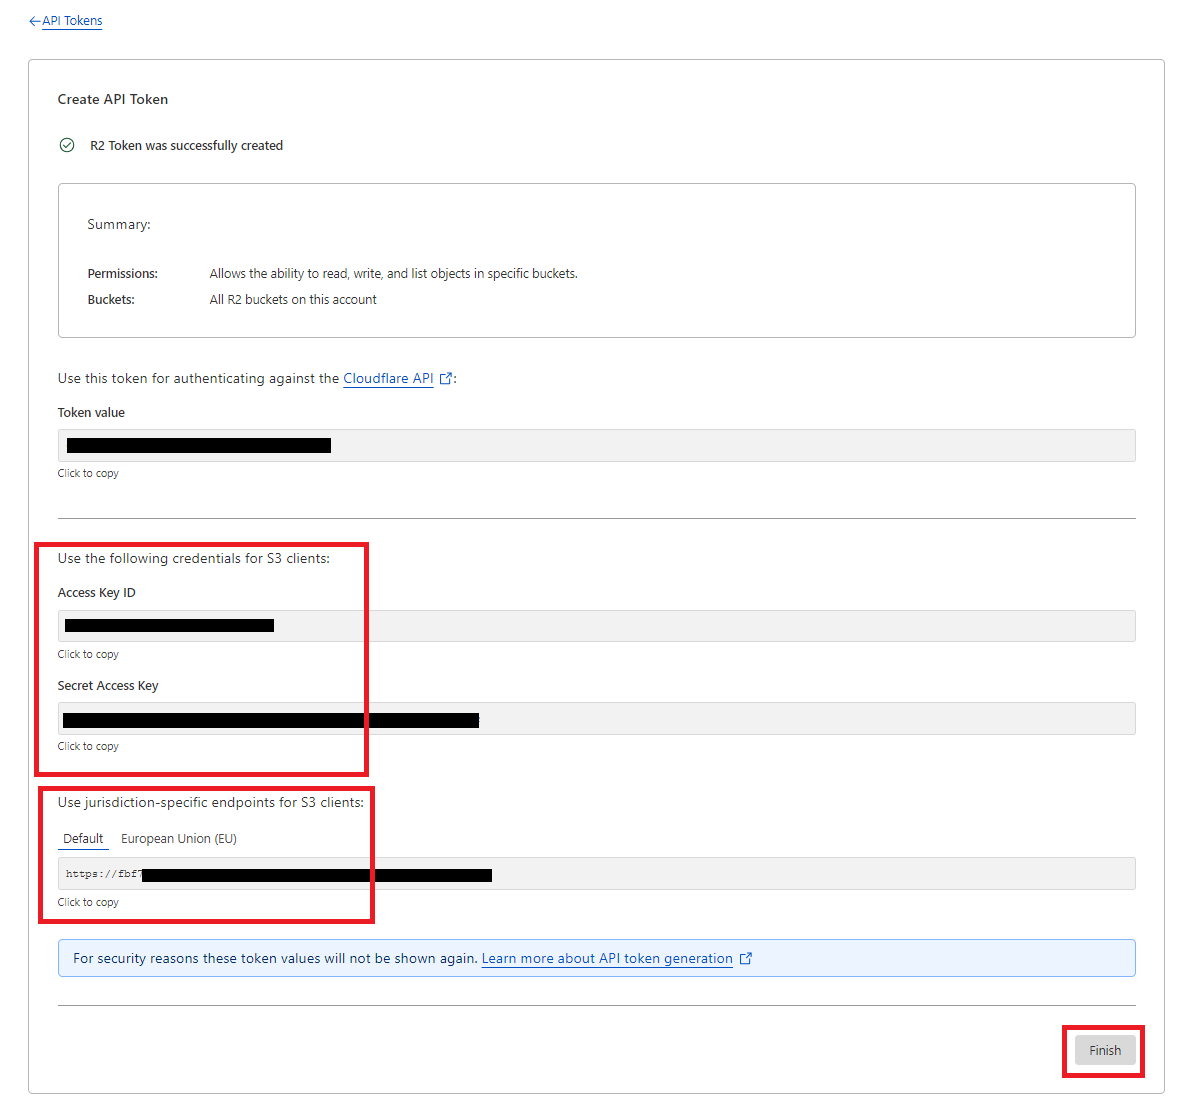
**Step 7:** On the next page, copy your **Access Key ID, Secret Access Key, and Endpoint URL**, then click the "Finish" button.

<div align="left"><figure><img src="https://1156155356-files.gitbook.io/~/files/v0/b/gitbook-x-prod.appspot.com/o/spaces%2Fpb8ANp0ZN6ZvWH8LcR5c%2Fuploads%2FLULbTPRyknVTVYCTBiEi%2Fflare6.png?alt=media&#x26;token=a3d2c9c6-18f1-4fee-9600-e29624c66086" alt=""><figcaption></figcaption></figure></div>

**Step 8:** Go to your Admin Settings and enter your CloudFlare R2 Access Key, Secret Access Key, Endpoint URL, and Bucket name, then click "Save."
